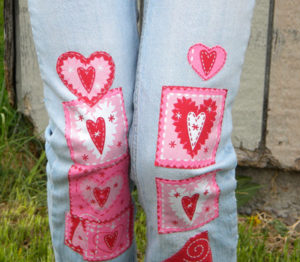
Patching Jeans with Applique
Applique is a creative way to patch jeans and making them look more natural instead of altered. You can also use this technique to just decorate your jeans because they will look sooo cute!

Here we go…Look at your jeans and determine the problems. These jeans have a couple problems. My daughter found a permanent marker and wrote on these jeans and she has a worn spot and hole in her jeans. (I am going to have to get creative to fix this and make it look good because they aren’t in the same position on each leg.)
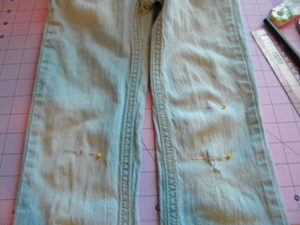
Take a pin and mark your problem areas like this. Only pin through the top layer – not both.
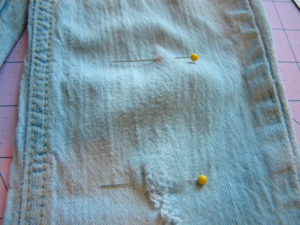
Turn your jeans inside out and locate the area you need to work within. You will see the pins where your problem spots were identified. Place a pin at the top of the area and just below it. This is the minimum amount you will need to open up in the leg’s side seams.
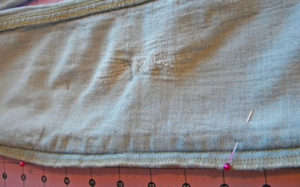
Notice that the seams of these jeans are different. Don’t open the side with the flat fold seam. Use the other one – which ever side it is on. Open up the seam until you can lay your legs flat to work on them. (To tear serging, rip the needle stitches a few at a time until you have the length you need. Then, the loopers around the seam should just ravel off.)

(I need to confess something here. I was using this method of ripping the seams carefully. After about 10 minutes of time-consuming ripping, I got out my embroidery scissors and cut through the loopers on the serged edges I needed to open. Then, I took my razor blade and just carefully cut through the two lines of stitching to open the side seams. Jeans are harder to rip out than any other type of garment and I got impatient, lol!)
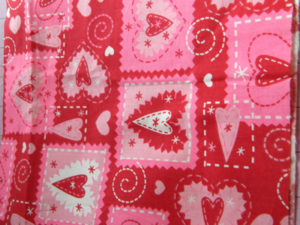
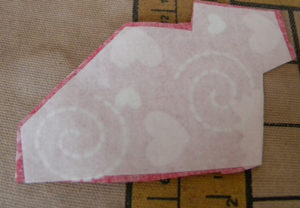
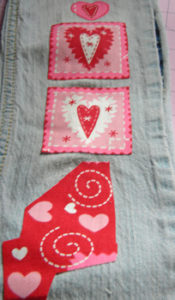
Now, you need some patches. You can get creative and make your own shapes or use a template. My favorite templates are cookie cutters. You can get some great shapes that way. You can also google practically any shape you’re looking for and find a variety of sizes to use as a template. However, I had this fabric that I thought would be a perfect template.
Next, cut your shapes from the template/fabric. Then, get some heat ‘n bond and iron it to the back of your patches.
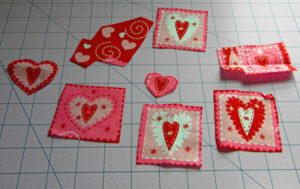
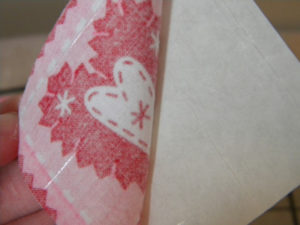
Cut the shapes from the heat ‘n bond out a tad smaller than the actual patches and iron the heat-n-bond to the back of your patches.
After they have completely cooled from the iron, remove the paper backing from the patches.
Take the patches to your jeans and try placing them where you need the coverage. Then, get crafty with the rest of the patches that you’ve cut out. Once you’re satisfied with the placement, iron the patches into place on the jeans.
Now, you’re ready to go to the sewing machine. There are a variety of things you can do to sew the edges.
1. Sew just inside the edges with a thread color that matches your patch.
2. Satin stitch around the patches, encasing the edges.
3. Make your patches about 1/3″ larger, sew around the perimeter 1/3″ from edge and then “rag” the edges in the wash for a fringed look.
4. Use a decorative stitch to sew around the edge catching both edges as you work.

Here I just used invisible thread and did a zigzag stitch around all the edges of my patches. The stitching isn’t perfect. But, then, that’s the beauty of using invisible thread.
Once you’ve finished patching your pants, you are going to sew the seams of your legs back together. To fix the serged area, zigzag over the edge or use whatever wide stitch your machine does just inside the edge of the seam allowance. You need to make sure this is reinforced in case you are too active and the side seam opens on you and to prevent further fraying.

(I’m assuming that you don’t have a serger. If you do, then serge it back together after sewing the seam line.)
Enjoy your new-ish jeans!